SYCL is an amazing cross-platform abstraction layer that allows you to develop heterogeneous software directly within an existing C++ codebase.
In the case of many existing SYCL implementations, you often need to install a custom compiler toolchain with additional libraries and specific backends. Installing these packages directly on a host machine can cause multiple issues, such as version conflicts with existing toolchains and losing control over package management.
To avoid these issues, I suggest installing a SYCL compiler in an Incus container. This approach provides strict environment isolation and better control over your dependencies. Additionally, Incus provides a straightforward way to pass a GPU device into a container.
In this guide, I will use AdaptiveCpp as the SYCL compiler. The GPU passed into the container will be an Intel Arc A310, utilizing the SYCL OpenCL backend. To verify the correctness of the configured toolchain, I will compile a simple SYCL application: GitHub - sycl-acpp-example.
These instructions are suitable whether you are configuring a SYCL compiler directly on a host machine or within a container using GPU passthrough.
This guide is divided into 5 steps:
- Setting up an Incus container and passing through a GPU device.
- Configuring the passed GPU within the container.
- Installing the LLVM toolchain.
- Installing AdaptiveCpp.
- Compiling an example SYCL application.
You can find common issues and solutions at the end of this guide.
Names and IP addresses used
In this post I'll use the following names and IP addresses. You should substitute these with your own values where appropriate:
-
ubuntu/26.04- the Incus container image with Ubuntu 26.04 LTS. -
sycl-adaptivecpp- the name of the created container. -
192.168.56.131- the static IP address assigned to the container. -
192.168.56.1- the gateway for the container's network. This will almost certainly be different in your setup. -
/root/adaptivecpp- the location where AdaptiveCpp will be installed.
Versions:
- Ubuntu LTS 24.04 - host Linux distribution.
- Ubuntu LTS 26.04 - container Linux distribution.
- Incus version 6.0.0 (client and server).
- LLVM toolchain version 21.1.8.
- AdaptiveCpp version 25.10.0.
Setting up an Incus container and passing through a GPU device
The process of creating an Incus container is straightforward. I'll use the latest LTS version of Ubuntu, which is 26.04 at the time of writing:
incus launch images:ubuntu/26.04 sycl-adaptivecpp
By executing incus list, you can verify that the new container has been created:

At this step, it's a good idea to configure the container: update the package repositories, install necessary tools, and set up network.
Enter the container:
incus exec sycl-adaptivecpp -- bash
Update the package lists, upgrade installed packages, and install any additional tools you prefer:
apt update
apt upgrade
apt install nano
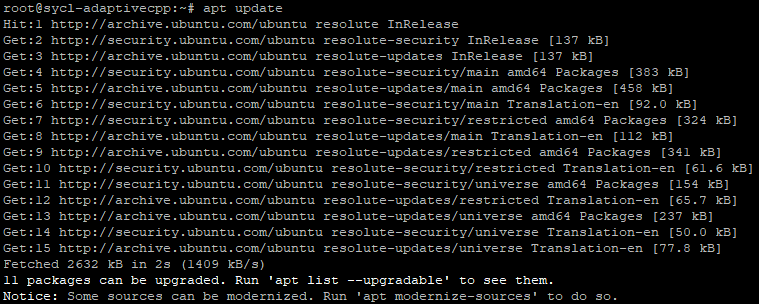
Even though the container was created from an Incus container registry, some packages still required an upgrade:
By default, the container receives an IP address from a DHCP server. It's also a good idea to set up a static IP in order to avoid potential connectivity issues later on, for example, when hosting services or transferring files over Samba.
Edit /etc/netplan/10-lxc.yaml with your preferred text editor:
network:
  version: 2
  ethernets:
    eth0:
      dhcp4: false
      dhcp6: false
      dhcp-identifier: mac
      addresses:
        - 192.168.56.131/24
      nameservers:
        addresses:
          - 192.168.56.1
      routes:
        - to: default
          via: 192.168.56.1
Here, 192.168.56.131 is the static IP assigned to the container, and 192.168.56.1 serves as both the gateway and the DNS server.
Apply the changes:
netplan apply
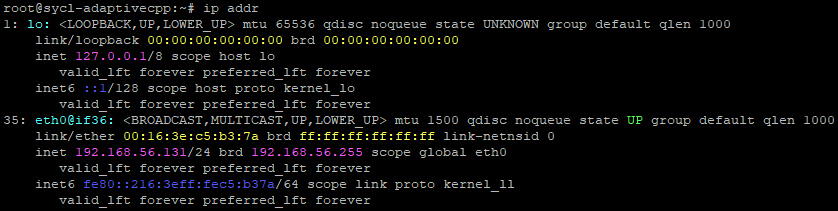
Run ip addr to verify that the new network configuration was applied successfully:
Exit the container to configure GPU passthrough on the host:
exit
One of the coolest things about Incus is how straightforward it is to pass through a GPU device. To do so, the GPU drivers must be installed on the host, and you need to identify the device's PCI address.
Find the PCI address of the device using:
lspci
In this post, I'm using an Intel Arc A310 that's passed through to multiple containers (such as Jellyfin, OpenCL environments, and other SYCL compilers).
Here is how the lspci output looks on the host server:

Pass the GPU through to the Incus container:
incus config device add sycl-adaptivecpp a310-gpu gpu pci=0000:45:00.0 uid=0 gid=44 mode=0666
Here, a310-gpu is an arbitrary device name, and 0000:45:00.0 is the PCI address from the previous step (which will likely differ on your system).
The uid=0, gid=44, and mode=0666 options configure the necessary permissions to ensure the device is accessible inside the container.
To check that the device was attached correctly, run:
incus config device show sycl-adaptivecpp
Here is the terminal output confirming the device configuration:

Inside the container, you can inspect /sys/class/drm to see all DRM devices, including the newly passed-through GPU:

Configuring the passed GPU within the container
To use the passed-through GPU, you must install the appropriate drivers inside the container. In my case (using an Intel Arc A310), the required drivers and packages are available directly in the default repository. For other hardware, such as Nvidia or AMD GPUs, installing the corresponding drivers follows a similarly straightforward process.
Instead of oneAPI Level Zero, I'll use the OpenCL backend for SYCL to keep this post applicable to as wide a range of hardware as possible.
Enter the container:
incus exec sycl-adaptivecpp -- bash
Install the OpenCL client driver:
apt install intel-opencl-icd
Install the OpenCL development headers and libraries:
apt install ocl-icd-opencl-dev opencl-headers
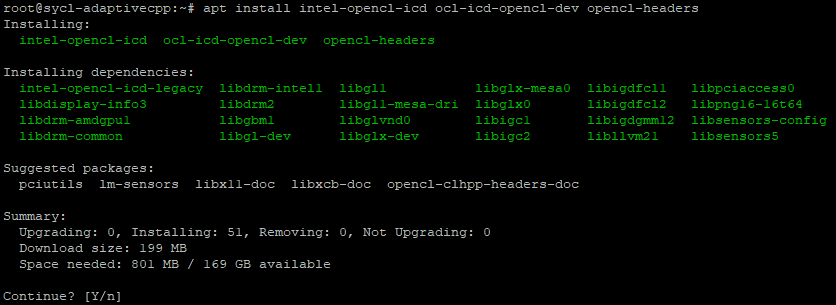
In this setup, the required OpenCL packages and their dependencies take up about 800 MB:
You can also install clinfo to verify that OpenCL detects the GPU properly:
apt install clinfo
Run clinfo:
clinfo
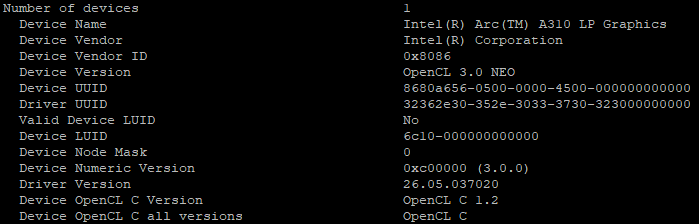
The clinfo output confirms that the Intel Arc A310 is recognized as an available OpenCL device:
Installing the LLVM toolchain
To compile AdaptiveCpp, you must install the LLVM toolchain. Version compatibility is important: for the latest release of AdaptiveCpp (currently 25.10.0), LLVM 21 is required. Note that LLVM 22 is not compatible with this release. While there're multiple ways to install LLVM, I'll use the official automated installation script pinned to the required version.
First, install the prerequisites needed by the installation script:
apt install lsb-release wget software-properties-common gnupg
Download the official LLVM installation script:
wget https://apt.llvm.org/llvm.sh
Make the script executable:
chmod +x llvm.sh
Install LLVM toolchain version 21:
./llvm.sh 21 all
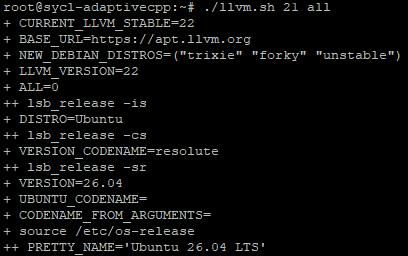
The script will download and configure the requested LLVM packages:
Verify that the LLVM toolchain was installed correctly:
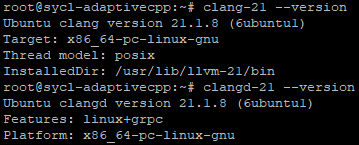
clang-21 --version
The output confirms the installed Clang and LLVM versions:
Installing AdaptiveCpp
The most straightforward way to install AdaptiveCpp is to clone the official Git repository and build it from source. I'll use Ninja as the build system, but standard GNU Make works as well.
Install the prerequisites required to build the compiler:
apt install git cmake ninja-build libboost-all-dev build-essential
You can omit ninja-build if you plan to use Make instead.
In this setup, the dependencies require approximately 1800 MB of disk space across roughly 230 packages:

Install the C++ standard library development packages:
apt install g++-16 libstdc++-16-dev
At this step, configure your environment variables so that the LLVM tools are used as the default compiler, linker, and archiver.
Additionally, set libstdc++ as the standard library.
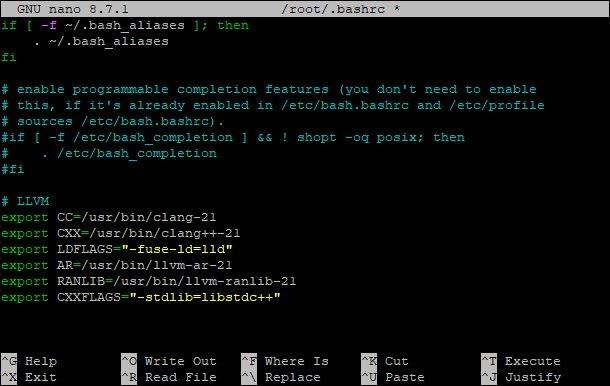
Add the following lines to your shell configuration file (typically ~/.bashrc or ~/.zshrc):
export CC=/usr/bin/clang-21
export CXX=/usr/bin/clang++-21
export LDFLAGS="-fuse-ld=lld"
export AR=/usr/bin/llvm-ar-21
export RANLIB=/usr/bin/llvm-ranlib-21
export CXXFLAGS="-stdlib=libstdc++"
Since this container uses Bash, the updated .bashrc file looks like this:
The new environment variables will apply on your next login, or you can reload them immediately in the current shell session:
# For Bash
source ~/.bashrc

# For Zsh
source ~/.zshrc
Clone the AdaptiveCpp repository:
git clone https://github.com/AdaptiveCpp/AdaptiveCpp
Optionally, check out a specific release tag:
git switch --detach v25.10.0
The repository will be cloned locally:

Navigate into the repository directory and create a build directory:
cd AdaptiveCpp
mkdir build
cd build
Configure the project with CMake:
# Using Ninja
cmake -GNinja -DCMAKE_INSTALL_PREFIX=/root/adaptivecpp ..

# Using Make
cmake -DCMAKE_INSTALL_PREFIX=/root/adaptivecpp ..
The /root/adaptivecpp path defines the target directory where the compiled binaries and libraries will be installed.
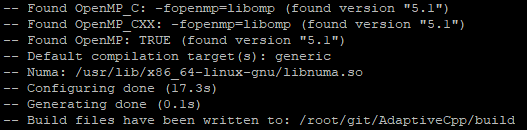
The build files are generated successfully:
Compile the project:
# Using Ninja
ninja -j0

# Using Make
make
The compiler builds without errors:

Install the compiler:
# Using Ninja
ninja install

# Using Make
make install
The compiler is installed into the designated installation path:

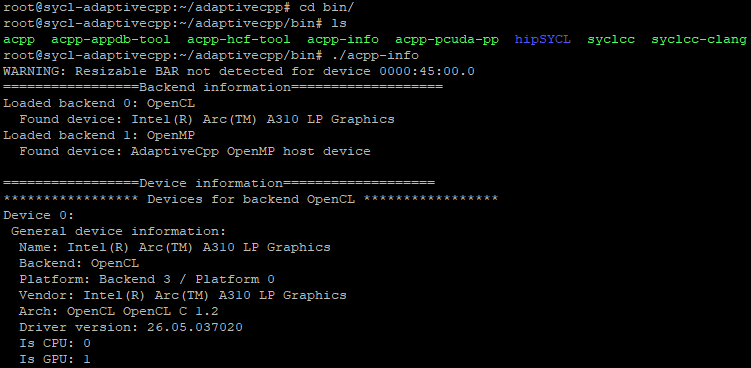
It's good practice to verify that the compiler built properly, the required target devices are detected, and there are no library or linking issues.
Navigate to the bin directory of your installation path (/root/adaptivecpp/bin in this example) and run:
./acpp-info
The output confirms that the installation succeeded and the Intel Arc A310 is recognized as an available SYCL backend:
At this point, the AdaptiveCpp SYCL compiler is fully installed and ready to use.
Compiling an example SYCL application
I have published a sample Git repository containing a simple SYCL project built with the AdaptiveCpp compiler. You can compile this test project to verify that your toolchain works as expected.
The project is available on GitHub:
Clone the repository:
git clone https://github.com/SavaLione/sycl-acpp-example
The repository will be cloned locally:

Navigate to the project directory:
cd sycl-acpp-example
Create and enter the build directory:
mkdir build
cd build
Configure the project with CMake:
# Using Ninja
cmake -GNinja -DCMAKE_INSTALL_PREFIX=/root/adaptivecpp ..

# Using Make
cmake -DCMAKE_INSTALL_PREFIX=/root/adaptivecpp ..
Here, /root/adaptivecpp is the path to your AdaptiveCpp installation directory.
Compile the project:
# Using Ninja
ninja -j0

# Using Make
make
Run the compiled executable to view your hardware topology and verify that computational kernels execute successfully across all accessible devices:
./sycl-acpp-example
The output displays the detected backends and confirms kernel execution:
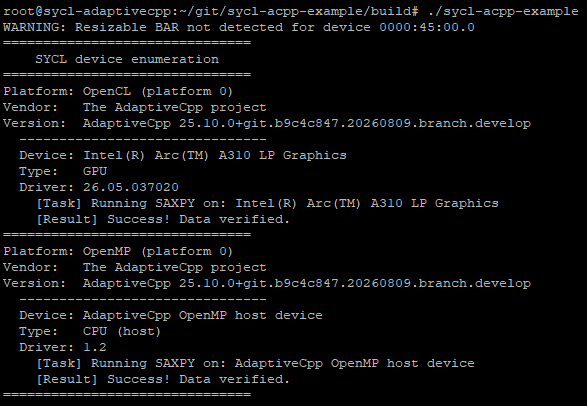
If the project is configured, compiled, and executed without errors, your AdaptiveCpp SYCL compiler is properly installed and verified. You are now ready to develop and run SYCL applications on your system. Congratulations! I wish you luck developing your SYCL software.
Note: CMake Warning - Cannot generate a safe runtime search path for target rt-backend-omp
If you encounter the following warning in your CMake output, it typically indicates that libstdc++ (GCC) was not configured as the default C++ standard library:
-- Configuring done (4.6s)
CMake Warning at src/runtime/CMakeLists.txt:336 (add_library):
  Cannot generate a safe runtime search path for target rt-backend-omp
  because files in some directories may conflict with libraries in implicit
  directories:

    runtime library [libgomp.so.1] in /usr/lib/gcc/x86_64-linux-gnu/15 may be hidden by files in:
      /usr/lib/llvm-21/lib

  Some of these libraries may not be found correctly.


-- Generating done (0.1s)
To resolve this issue, refer back to the environment configuration step and ensure that the following variable is properly exported in your shell:
export CXXFLAGS="-stdlib=libstdc++"
See also
- AdaptiveCpp (formerly known as hipSYCL / Open SYCL)
- A great introduction to SYCL from Sussman Lab: Sussman Lab - SYCL, CUDA, and heterogeneous computing
- LLVM Debian/Ubuntu nightly packages
- AdaptiveCpp Documentation